Friday, October 16, 2015

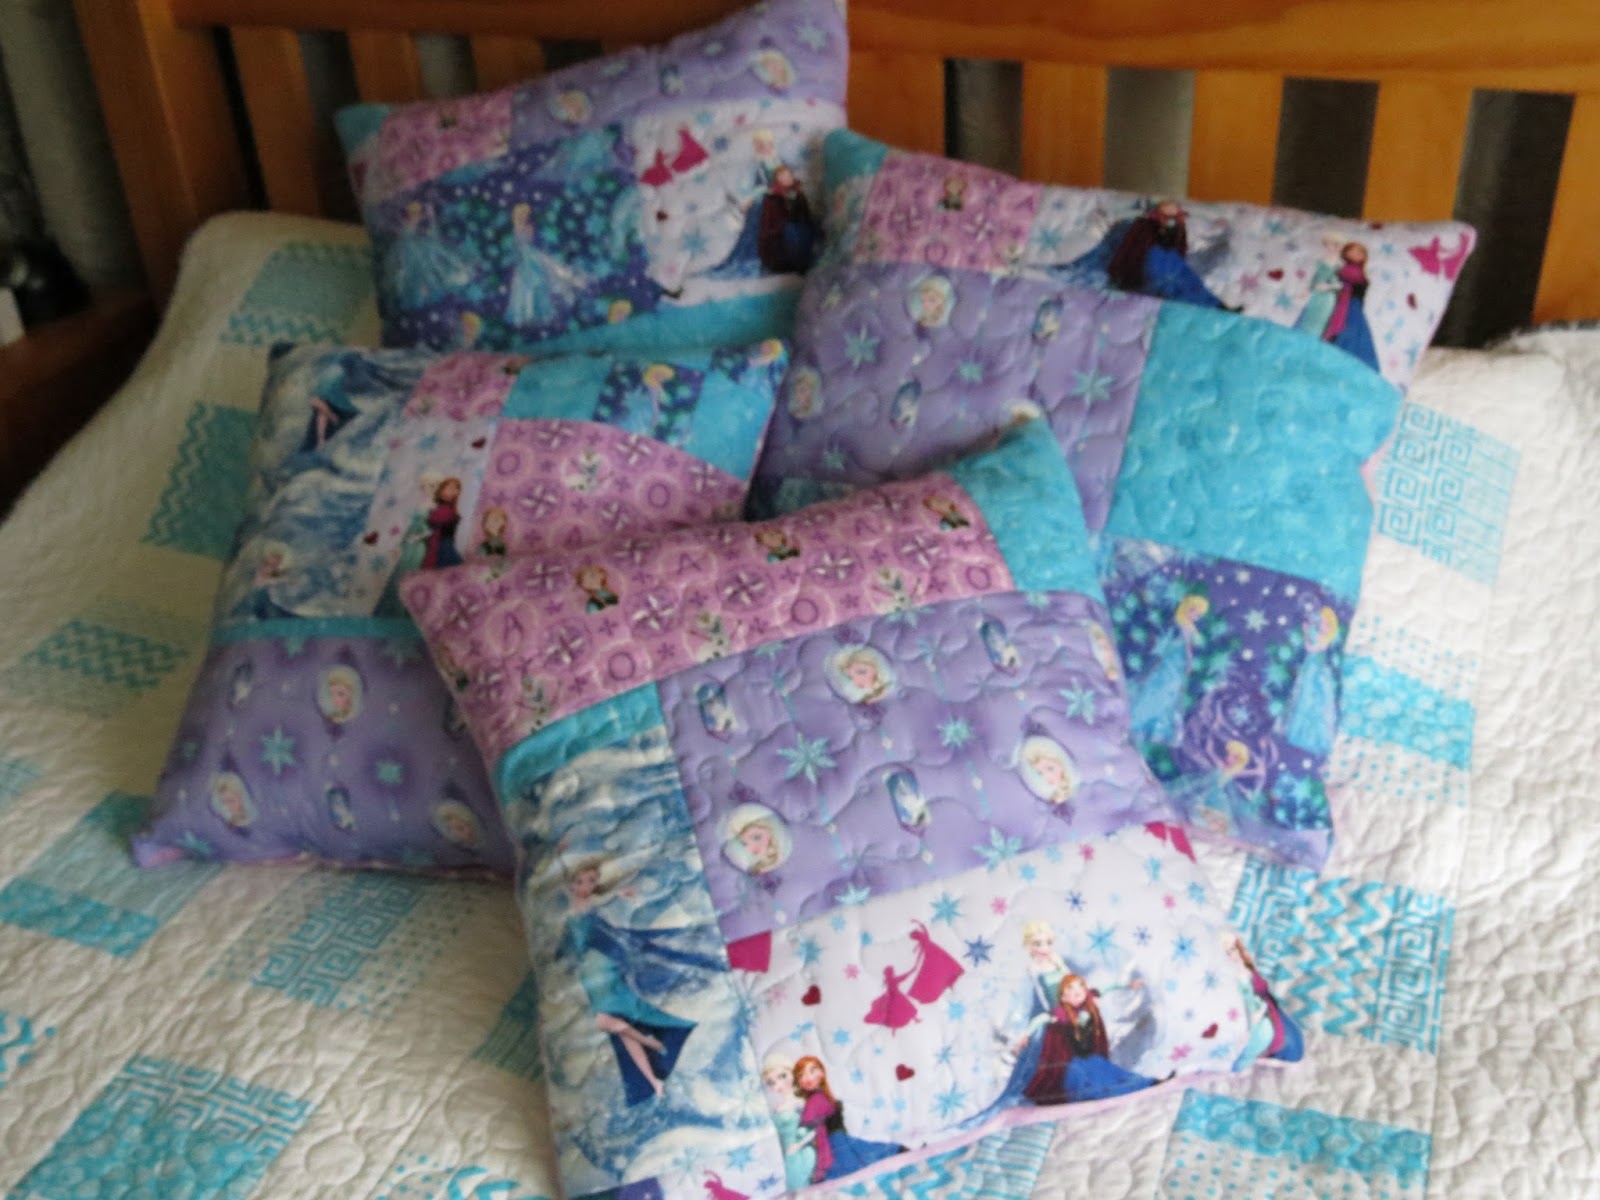
Frozen pillows

No, not the weather - the movie! I created these four pillows a couple of weeks ago using Frozen fabrics and a lilac spot minky from Spotlight...


Two are 18" pillows and two are 20" pillows...


I fussy cut the fabrics so there are plenty of princess pictures to delight any young Frozen fan...


...and quilted each panel with a swirly, loopy snowflake-style design...


Sharing my projects with the quilting world through Kelly's Needle and Thread Thursday linky party...and Sarah's Whoop Whoop link-up...as well as Amanda Jean's Finish It Up Friday linky..."kia ora" everyone!

I was making one for my Frozen-fanatic little cousin Claudia, turning 5, and figured if I was gonna make one, I might as well make four! Here is Claudia having just received her present...

...two sold at market and I have just one more left to sell/gift...


Sunday, October 11, 2015

2015 Finish Along 4th Quarter Goals

Here's hoping!!! Am keeping it short as this term will be busy busy! If all goes to plan then I will be able to claim success with this quarter of the 2015 Finish Along challenge!

But...

PRIORITY #1
I want to finish this quilt, or rather, NEED to finish it - as Brian and I have promised to donate it for the auction at the Charity Bowls tournament coming up in November...it needs quilted and bound, so I will get onto it once I get my machine back from being serviced.
Oct: Done! And sold at auction for $160 - see it here!
PRIORITY #2
I also need to get these fabrics made into a special quilt for the end of the year (more details later...)
Dec: DONE! And she loved it! Click here!
PRIORITY #3
Finish this Triple Barnstar quilt...

NOT PRIORITIES but I'd like to also finish these two Easy As Ten quilts...
pink/orange version
blue/purple version
And if any of these get finished before Christmas then that will be a bonus!
 Fandango Jumping Jacks quilt
Christmas quilt - I have a jelly roll to use for borders
1 + 2 Easy quilt with these and a couple of other fabrics I have pulled from my stash
Dec: DONE! Looks awesome and I love it! Click here!


Thursday, October 1, 2015

Chequers Pillows

Or, as we call them here, cushions!

After great success with the Q2 list (and even winning a prize) I am failing miserably, despite all my good intentions, to complete my Finish Along Q3 list (life just gets in the way of good intentions sometimes, as well as the fact I've been distracted by some new projects eg pillowcases and tote bags and a couple of other WIPs that weren't actually on my list!)

But I HAVE got this goal done (now that it is school holidays so I can fit in a bit of down-time in between preparing for next term)...I had these squares left over from my 50c Mixture baby quilt ...

The panels were only 12" in size and the smallest inserts I could buy at Spotlight were 14" so I used some of my precious leftovers of the Remix Ovals by Anne Kelle for Robert Kaufman, to make 1 inch borders around the panels, with a lovely grey spotty print to make the envelope backings (made as per Crazy Mom Quilts' instructions).


Big "hi" to visitors from Kelly's Needle and Thread Thursday or Amanda Jean's Finish It Up Friday linky parties!


Saturday, September 26, 2015

Tote Bag tutorial


For a quick, basic, lined bag, with a feature fabric on one side and strips of prints on the other, this is what I do:

1. Cut one panel of 16" x 18"

2. Cut 16" length strips of even width, or mixed widths depending on the effect I wish to create, eg between 1.5"-4", cutting enough to make a 16" x 18" panel when sewn together. 

3. Layer each panel with batting (and a muslin backing if wish) and quilt as you like.


4. Trim both panels to 15" x 17". Place right sides together and stitch 1/4" or 1/2" seam around the sides and bottom. 

5. Make a gusset so the bag has a flat base: flatten the sides of the bag so that the side seam rests against the base seam and form a triangle.  Sew 1 and 1/4" across the point (I usually do it three times) then trim the point off. Repeat on other seam. 


6. Cut lining fabric 17.5" x 15.5" (two pieces or cut on the fold). With right sides together, sew the side seams and bottom, leaving a four inch gap in the bottom for turning the bag later.  

7. Make a gusset in the lining, as in steps 5 and 6.  

8. Make handles for the bag, choose desired length - mine is usually about 28" (pre-sewing). For two-colour handles: cut two strips of each colour, 2.5" x 28". Press a 1/4" fold along the length of both sides, of each strip. 

9.  Cut batting of 1.5" x 28". Wrap first colour around the batting, then layer other colour on top to make a sandwich. Sew 1/8" along each edge (or closer if possible) and also sew a strip right down the middle of each handle. 

10. Attach handles to the outside of the bag and pin in place, keeping the pins away from the upper edge). Stitch 1/4" from the top edge, triple stitching for reinforcing. 

11. Insert the bag outer into the lining so that the right sides are together and the handles are tucked down out of the way.  Stitch 1/4" around the top, reinforcing over the handles and side seams. 

12. Carefully pull the quilted bag through from the inside by using the gap in the base of the lining. Fold the top down and slip-stitch the gap closed. 

13.  Top stitch around the upper hem of the bag, holding handles up out of the way. 

The bag is finished, remember to date/label it somewhere!